Photographers

Artistic Portrait Photography Course Information
Zhang Jingna Photography Blog |
| Final demo image from the Artistic Portrait Photography course |
Course Scope
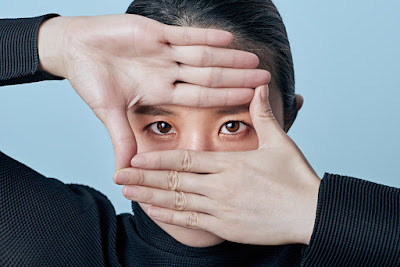
There are 8 lessons in this course. I will cover a wide range of topics from the basics of photography, to putting a shoot together, photoshoot day, and my retouching process when doing one of my fine art portrait photos.I focus a lot on the fundamentals and essentials that I find important to my photography. The idea is that after this course you will have a structured way of putting a shoot together, that you can do anything you wish to and it doesn’t have to apply to fine art portraits only.
Difficulty Level
I’d say photographers of all levels can learn from this course including those who have never touched a camera. However, I think most beneficial would probably be for beginners and intermediate photographers.Beginner: It’s fine if you are completely new to photography. I go over the camera and lighting basics which would help you get started. When it comes to Photoshop, I may go over some basic functions rather quickly. But if you have any questions you can always post in the Learn Squared forums or chats, there are usually other students or staff around who are happy to answer.
Intermediate/Hobbyist: The course is probably most beneficial for those that find themselves falling within this bracket. I go over a lot of essential fundamentals that I find important in my photography workflow. So if you have already played around with a camera, Photoshop, and have some vague idea on what you want to do but don’t really know how to get started, this course will help you. The process will teach you learn how to structure, put a shoot together, and polish your final image.
Advanced/Professional: For advanced/professional photographers, I think the course is a good benchmark to check against for your own personal workflow. In general, my offline workshops are attended by professionals, but as there is no time limit for this online course, I've made it more detailed and covered more basics which I don’t usually teach in regular advanced classes.
Package Breakdown
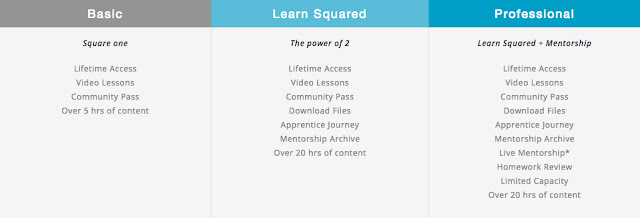
The Learn Squared website sells 3 different packages for the course:Basic: This include over 5 hours of video content and access to the private student community on Learn Squared.
Learn Squared: This includes over 20 hours of video content—video tutorials from the course, my homework review with my apprentice, Maciej Kuciara, as well as recordings with past mentorship students on their homework reviews and Q&As.
Professional: This includes everything in the Learn Squared package plus weekly live mentorships sessions. This is where I will mentor and give feedback to students and answer questions individually. We take a small class for each batch, so everyone has the chance and time to have their questions answered and work reviewed.
Lesson Breakdown
1. Photography Basics
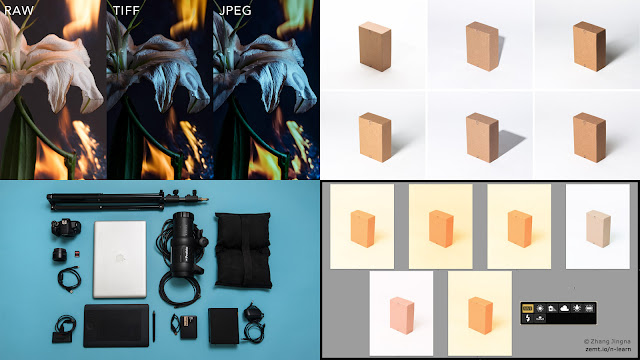 |
| Lesson 1 - Photography Basics |
Students are assigned to create images around design elements and principles:
 |
| Gilchan Oh, Lesson 1 Homework |
 |
| Alena Kazakevich, Lesson 1 Homework |
 |
| Alex Chua, Lesson 1 Homework |
2. Equipment and Lighting
 |
| Lesson 2 - Equipment and Lighting |
In lesson 2, I discuss a list of all the basic studio tools and lighting equipment that I use.
Lighting examples are also given for various modifiers, environments, ambient lighting, etc, in how they create different types of lights and moods:
 |
| Lesson 2 - Equipment and Lighting |
Student homework was to execute on what was covered in the lesson, and experiment with various lighting modifiers:
 |
| Melvin Wong, Lesson 2 Homework |
 |
| Zanelli Caldas, Lesson 2 Homework |
 |
| Henrik Bengtsson, Lesson 2 Homework |
3. Concepts and Casting
 |
| Lesson 3 - Concept and Casting |
For this lesson, I cover the initial concept creation process as well as how to cast and search for models. Students are taught how to put a concept board together and things to watch out for in casting:
 |
| Alex Chua, Lesson 3 Homework |
 |
| Melvin Wong, Lesson 3 Homework |
4. Team Building and Planning
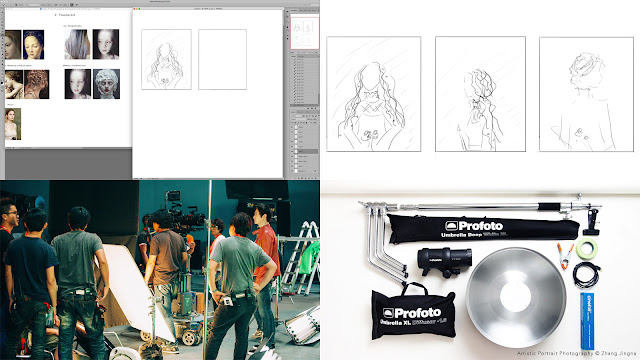 |
| Lesson 4 - Team Building and Planning |
I discuss what to do when things go wrong, break down the roles and what is expected of each member on a photoshoot crew, and how to plan your shoot day, schedule, and send out a call sheet. I also go into more details on a photographer's roles and responsibilities, so that you will be well-equipped and understand the expectations for your shoot day.
For this class, students are tasked with finding their crew, revising their concept board, doing a light test, and finalizing shoot details.
5. Photoshoot
 |
| Lesson 5 - Photoshoot |
I start with the various workstation setups, both for the hair and makeup artists and for the photographer. Then, I cover the process in working with the model and team. This lesson goes into detail on each point because every factor is important.
6. Post-production
 |
| Lesson 6 - Post Production |
 |
| Youssra Fawzy, Lesson 6 Homework |
7. Retouching
 |
| Lesson 7 - Retouching |
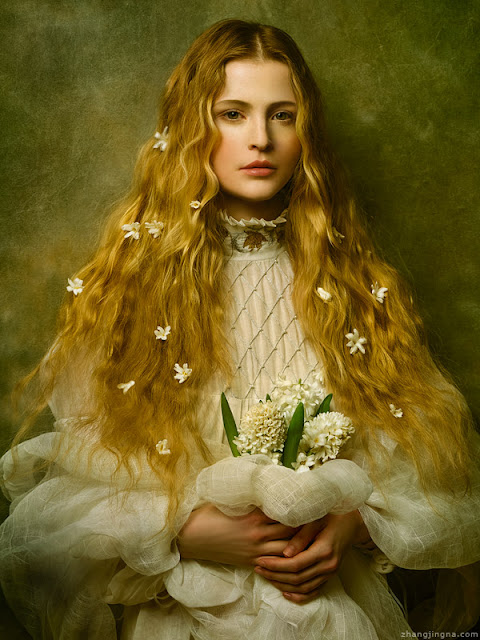 |
| "Germaine III", retouched image from course demo. |
8. Branding and Marketing
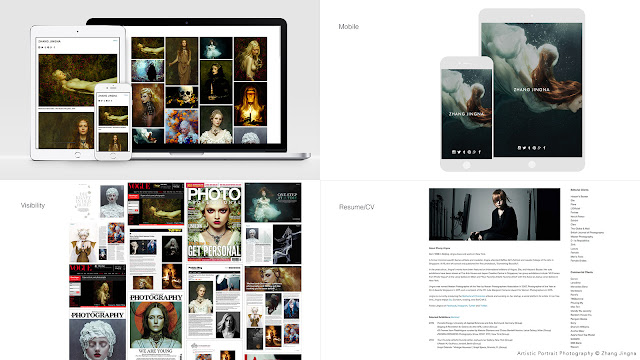 |
| Lesson 8 - Marketing and Branding |
So while this course is more abstract than specific subjects such as fashion or beauty, I wanted to cover some avenues to follow up on what you have done. In this lesson, I go over some of the key points in branding and marketing, and I hope that you guys will find it useful.
Student Homework
Below are some images from students who have shared their final work:
 |
| Germaine Persinger, Final Work |
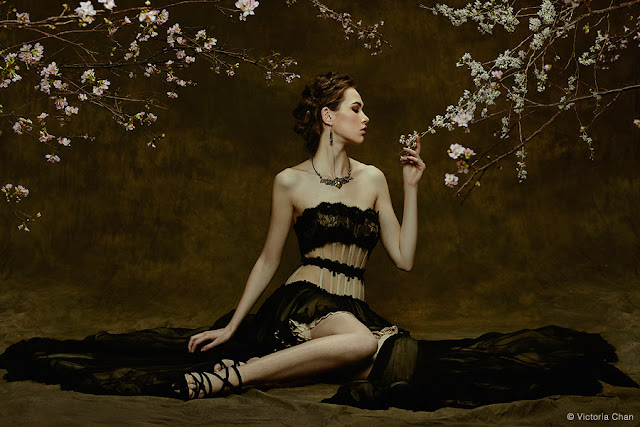 |
| Victoria Chan |
 |
| Peter Phung, Final Work |
 |
| Samantha Ong |
 |
| Melvin Wong, Final Work |
 |
| Alex Chua |
 |
| Shadow Wong, Final Work |
Student Experiences
". . . incredibly inspiring. I’ve made so many adjustments based on what you’ve shared and I will keep refining my process until I internalize at least a small portion of the effort and quality that you infuse all your work with. Thank you!" - Volen CK, Learn Squared Term 2 – Big Notes and Insights
"I really enjoyed this course by Jingna . . . This course helped me to refine my approach to artistic portrait photography." - Peter Phung, Lesson 7 Homework
"Thanks so much for sharing your workflow . . . watching the video on how you use photoshop tools and how it is being applied is very useful and broadened my knowledge on the functions." - Zantz Han, Lesson 7 Homework
Blog entry from my apprentice, Maciej Kuciara, on his experience doing his very first photoshoot: http://www.kuciara.com/#/tearsinrain/
Wrap-up
This is going to sound trite, but one of the most rewarding part of doing this course has been watching everyone's progress. Even though I spent an average of over 40 hours putting each lesson together, I'll be the first to say that I don't think the pacing for the course is perfect—some parts may have been too advanced for beginners, and some parts may have been too basic for professionals—but being able to see a wide range of work from students of all levels, that's been incredibly inspiring and humbling. So to everyone who took the course despite these shortcomings, and especially to those who took the time to share some of the results of what they have done, thank you all so much.
New Mentorship Sessions
Professional mentorship sessions are weekly live calls with students where I go over tips, critiques and answer any individual-specific questions.
New mentorship sessions will begin Friday September 9th. Sign up here.

