Tips & Tricks
The making of "Urbino night"
1x Blog-Tips & Tricksby Gus
Sometimes it happens that we are really found of an image, like in this case.
I always loved to photograph narrow streets.
I took this picture late evening while on a trip with my lovely wife.
The conditions were not ideal but immediatly I had in mind to make something different with it.
Here is the result and explanations about the whole processing.
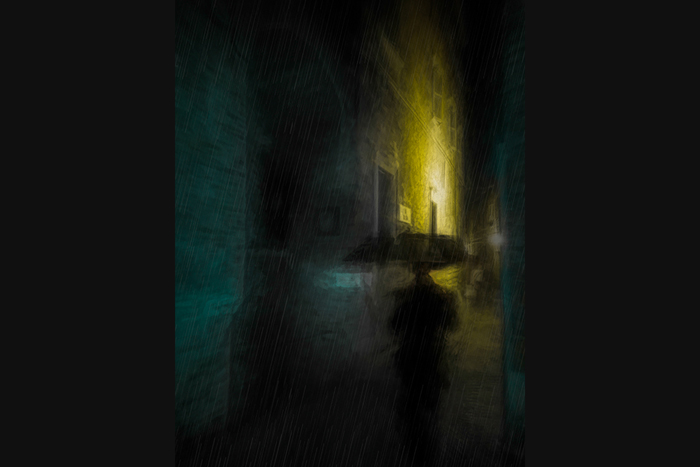
"Urbino night" by Gus
This is the original photo before I started any procession.
 Canon EOs 450D . ISO800 . 1/15sec . f/3.5
Like usual I did the first changes in Adobe Camera RAW: straightening and framing the image to have the composition I wanted, before going to Photoshop.

Once in Photoshop, I created 4 duplicates from the background layer to work on each separately without damaging the first layer. I gave each layer a name to know exactly what I did on each of them, not to get lost.
For the first copy layer, I was looking fin the Topaz Impression filters to find a kind of abstract one which would not loose too many details. Later in this tutorial you will see I recovered the small details that I lost.
I thought that the Chalk Smudge filter would work very well here. I adjusted the values till I was satisfied. I did not change the fusion mode.

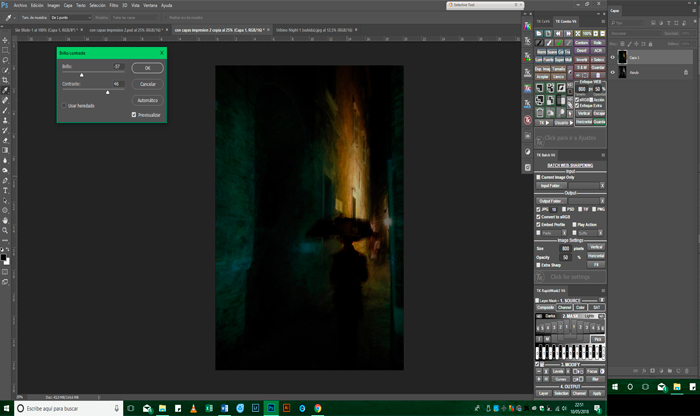
In the second copy layer, which I called “Brightness / Contrast”, I created a luminosity mask in medium tones to cover most of the photo where I adjusted the brightness and contrast to my taste. I have managed to lower a bit the brightness of the high lights which were bothering me and worked on some of the shadows. But I didn't loose any sharpness or details and changed the fusion mode to “darken”.

The colours and tones were now satisfying but I wanted to work more on the details. Therefore I used the fourth layer called “opacity” and used a value of 30 (which you can easily adapt to your own taste). You can see now how the details of the windows appear and how the whole image becomes sharper.

I also wanted to add a person as the main "actor", I decided to add rain and a lady with umbrella. I found the silhouette in my “bank of images”.
Finally the image started to look like I wanted it. A dark alley with some light at the end and someone walking through it on a dark rainy night. I only had to add the rain, but first, I did some more adjustments on the image, mainly the brightness and contrast. I darkened some parts who were not essential. When finished I merged all the layers, made a duplicate of it and converted it to Black and White.

Next step: I went back to the original image, did a “copy paste” on top of the black and white image, changed the fusion mode to Darken. Than I worked a bit more on the brightness and contrast on the places I wanted.

I just needed to add the effect of the rain. Therefore I used a “PNG” and adjusted brightness, contrast and the optic to my personal taste.
This is the PNG I used in this occasion.

Last thing before finishing the processing was to merge all layers and adjust brightness and contrast if necessary.
This is the result I felt comfortable with.

Final result “Urbino Night” by Gus
I hope you enjoyed this tutorial and will inspire you to give it a try on your own work.
Cheers, Gus
. '


![Fstoppers Photographer of the Month (April 2018): Rebeca Saray [NSFW]](https://cdn.fstoppers.com/styles/large/s3/lead/2018/05/fstoppers_photographer_of_the_month_may_2018_rebeca_saray.jpg)