Tips & Tricks
.jpg)
Profoto Blog Series: Personal Project Walkthrough, from Idea to Realization
Zhang Jingna Photography Blog-TipsMy second article for Profoto~
Having covered the process for a commercial assignment in my last article, this time round I’ll be talking about my approach to producing a personal shoot in a similar fashion, but starting earlier in the workflow, from conceptualization instead of simply receiving a brief, as one would a commercial job.
Before I begin, I’d just like to say that I see commercial and editorial work as a resume of a photographer’s skills and personal work as the mark of his or her identity. With this in mind, I think a photographer’s approach towards commercial and personal work should be separated as much as possible.
Of course, things like style and aesthetics will naturally bleed into one another, which is fine, but concept wise, a commercial work should always be done with a client’s products or services in mind, whereas personal work should be something a person wants to express or share with the world, thus making it personal.
In this post I’ll be covering the approach and considerations I put towards a typical production for one of my personal shoots. Unlike commercial projects, there are no set rules and requirements for how you do it. We may all work differently and this is my take. I hope you enjoy the read.
1. Before You Begin
In most cases, we don’t have endless budgets to do whatever we want to do or an avenue of publication for personal work before it begins. Because of this, a lot of doing personal work boils down to challenges in getting people to work with you and finding time outside your main job to make it happen. Here are some key factors to consider in setting up the foundation of your series:
1. Theme and Concept
2. Your Team
3. Model Release
4. Model Search
5. Lighting and Style
6. Timeline
7. Budget
8. Image Terms
This is the starting point, whether it’s a broad theme or specific idea, it expresses what you want to say. It’s the reason you’re doing the project. Having decided on this, it will determine how you’ll approach your entire series in terms of style and affect how your production will be done and what will be involved.
Here are some of the images that inspired me for Motherland Chronicles:
Makeup, hair, and styling styles change from person to person. Finding the right people who can work with you on a regular basis is extremely important, as their work will play a key factor in how your images will look. A dream team requires failures and time to put together. Be patient, work with people you like and who like you.
If all fails, there’s always a little DIY that can be done by either you or the model. If you don’t have time to learn makeup, models should be able to do their own makeup in most situations, so you can go from there as a starting point before you have a full team.
This is very important and non-negotiable. Without a model release you’re going to run into a lot of problems when you want to publish your work. Get it out of the way upfront, make sure the model has no problem with your release and get it signed after the shoot is done. I usually use a full release, but sometimes with model agencies it will be limited to specific art-related usage like photobook, exhibition, prints, etc.
Finding the right models can be an arduous task. But just like finding a dream team, you have to be tenacious about it. Personally, I go through a few hundred pages of models on ModelMayhem, scout on the streets, ask friends and people I know, and sometimes even ask assistants to model for me or do self portraits.
Model agency is an option too, but rates can get complex and some may not be willing to sign an all-rights release. Keep that in mind when negotiating. And don’t forget, whether you find a person online or in person, always do a casting.
This is a decision you have to make early on. Lighting and post processing are going to be the unifying factors in tying the series together. Even if your theme and concept is consistent, if the style and lighting don’t flow as a series, the images will look like they don’t belong in the same body of work.
I had a number of different influences of art for my series, so I focused on keeping the lighting very soft to create a painterly effect:
It’s easy to procrastinate or leave images in backlogs when you’re the only one supervising the final work. Make a deadline for yourself and commit to it — there is no quality without quantity — push yourself to meet each deadline and move on. You can come back and polish up the images at a later date when the project has concluded.
There can be a lot of expenses involved in a production, draw up an estimate to get an idea of the big picture. It can be very simple, such as the basic things you know you’ll need each time, for example: lighting rentals, transports, meals, maybe $50-100 for props or set production once in a while. It’s good to know how much you’ll need to complete the series so you can ration expenses accordingly.
Similar to the model release, you want to mention this upfront with everyone you’re working with. Clarify whether you’ll be publishing images whenever each shot is completed and send them to the team, or if you plan on saving it all for when you’ve completed the project and will be publishing it in book form.
2. Photoshoot Key Points
The above are what should be established at the beginning of your series to be kept consistent throughout the project. Below, I will address some shoot-specific points, covering my thoughts and work process leading up to each one:
1. Inspiration and Research
2. Conceptualization
3. Mood Board
4. Composition Sketch
5. Mood and Lighting
Based on the theme you have decided for your series, research and find things that click with you. It could be ideas, words or images, save them all and create an inspiration stockpile.
From there, you can pick out specific inspirations or ideas, either make a list of images you have in mind to accomplish upfront, or if you’re like me, go off the list based on what you feel like for each new shoot.
Usually one element is enough to serve as inspiration for a shot — it could be a color, an item, a time period, a location. For cataloging, if it’s just an image-based inspiration, making a folder and saving pictures to it is more than enough. If it’s something that requires purchase, rental or scouting, Pinterest is a good idea for bookmarking the things you find. It’s easy to see everything at one go and also keeps the direct links and descriptions for when you need them. (You can also make secret boards so your research is kept private.)
One thing to remember for research — stay focused and stick to your original theme — it’s easy to get distracted by new things you discover as you browse and go through links, but not everything that you come across will sit or mesh well with what you’re creating.
Based on the inspiration you’re working with, build upon that element to come up with the concept for how the image will look like in your mind.
For example, if you are using a medieval dress, think about the kind of character who will don that, the sort of look she will have and the sort of persona she will carry. Based on her story, think about the type of hair, makeup, accessories and setting that she will be in.
Pull references for each element so you can remind yourself or show your collaborators when those are needed. Images will always convey more easily than words. When it’s all done, tune it realistically to what is achievable and suitable to your lighting and style for the series.
Below is an example from the series inspired by candlelight from Georges de la Tour ’s paintings (sourcing for the chamberstick prop can be seen in the Pinterest screencap above):
Create a folder or presentation with references for the style of hair, makeup and styling for your team. I usually narrow down the references I have from the conceptualization step, just 2-3 images for each person is enough.
It will be a good idea to include some mood references for lighting and composition as well, so your team can have an idea of how you will be shooting the photo.
This is a good time for the team to feedback and make suggestions to you or tell you if something cannot be done, so you can work together on an alternative. Clear communications are extremely important in these, make sure everyone knows what they’re doing.
Composition to me is one of the most important elements in photography. It’s a combination of the model’s pose, your framing, and lighting.
You don’t need mad skills in drawing, and personally I’m only capable of stick-figure sketches, but they serve just as well. It may be a simple scribble, but most of how the image will look takes on a more concrete shape in my head here.
When you’re done, use it as a point of reference for shooting and layout, and your team will also be able to present the best side of the model for that framing. Of course, you don’t have to stick with it 100%. But with these determined beforehand, you will be able to shoot more efficiently and smoothly.
For the triptych “The Three Graces”, I had three incredible Venetian masks from the maker Casin dei Nobili in Venice. Concerned about composition, such as how the images will go well and flow together, sketching out the set was especially important here:
As I’ve mentioned above, for a series, besides the stylistic direction of the model and clothing, lighting is one thing that should be kept consistent to lock the series together.
If at any time you think you may need to light something differently for any reason, be sure to test it prior to the actual shoot. For my series, I stuck with large light sources for a painterly look in the studio, and often used a large Profoto Deep White Umbrella XL and diffuser, with a mix of black and textured backdrops from Savage Universal for an added painterly touch.
With all the pre-production well-prepared, be confident going into the shoot. My advice on set is the same as what I’ve talked about in the previous commercial photoshoot walkthrough post, there are just three things I’d like to add on:
Personal work is the best place to be a perfectionist. Make sure you have every single element down pat and that they work well together with one another. I personally do 2 looks for each shoot at the very max, and for more complicated setups, one look can easily take 5-7 hours.
If you’re uncertain about something, take your time and work it out. This took me time to learn but I’ve come to realize that I rather not regret not trying something. That’s why working with a team you’re entirely comfortable with and can be understanding is so important. You don’t want to feel embarrassed, uncomfortable or rushed if you need a few moments to think about your next step or decision. You don’t want to be done with a shoot and think, ‘I wish I had taken the time to try that different backdrop just now’.
Remember to get model release signed!
4. Post-Shoot
Send images to your team once you’ve finished them. Prepare both high resolution images as well as web-res for social media posting.
Make sure you file away the full credits of your team, as well as documents such as model releases or any agreements and contracts. Good documentation and filing is very important and you will appreciate the time you took to do them when you need it one day.
5. Publicity
The most amount of work you have to do post-shoot is probably publicity. Since it’s personal work, you’re the one responsible for getting it seen and published for your team.
There are many avenues online — such as portfolio galleries like Behance, deviantART, and Flickr, and social media websites like Facebook, Instagram and Twitter. But you should also prepare a press kit to send to blogs and news sites that feature works with similar themes to what you have done that you like.
If you get featured, share the news with your team! They’d love to know that their efforts are acknowledged and that people love the work you have done together. If the images are featured in print publications, don’t be shy about asking the editor for a hi-res PDF. It will definitely look better than the version you can get with your scanner, and will probably be something good to keep in your portfolio and resume for the future.
And that’s it! I hope you will have a good time shooting some personal work, if not, consider doing so! It’s so especially fulfilling and can be highly enjoyable, as well as being a great learning experience. Once again, if you have any questions please don’t hesitate to ask. And if you’re interested in the personal series I’ve been working on, please check out the images below, the Motherland Chronicles website, and also behind the scenes on my blog!
--
Want to learn more? Check out my online course Artistic Portrait Photography.
More: photography articles, gear list
Some of the product links in this post will bring you to Adorama and Amazon , where I'll get a small referral fee should you decide to make a purchase. This helps with the time spent on articles for this blog, so please consider supporting the website. Thank you!
Profoto Blog Series:
- Commercial Photoshoot Walkthrough, from Request to Post-Production / 中文翻译
- Personal Project Walkthrough, from Idea to Realization / 中文翻译
- 14 Steps to Improve Your Photography / 中文翻译
- 15 Tips on How to Break into Fashion Photography
- Top 10 Photography Lighting Tools
- 14 Tips for Photographers Who Want to Go Pro
///
Zhang Jingna:
Website
Instagram
Twitter
Facebook
Article first posted on the Profoto Blog, 26th May 2014.

.jpg) |
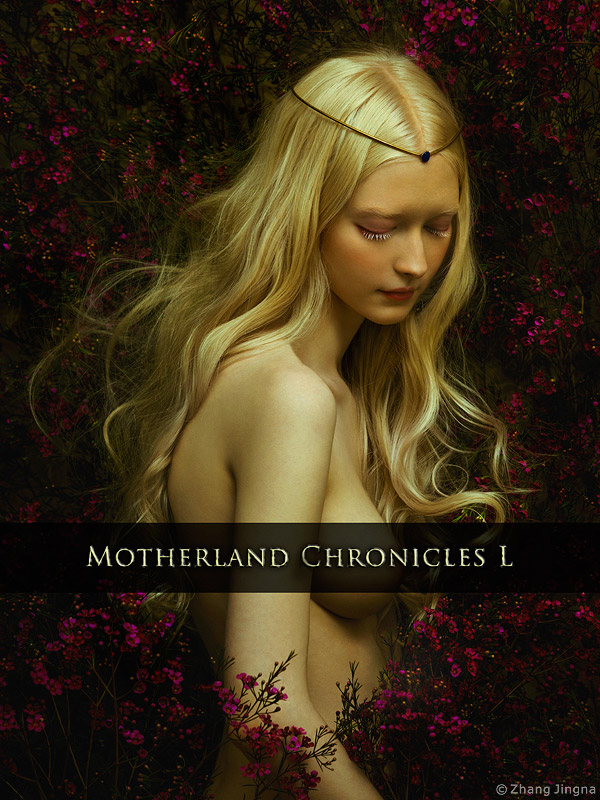
| Motherland Chronicles #50 – Eurydice |
Having covered the process for a commercial assignment in my last article, this time round I’ll be talking about my approach to producing a personal shoot in a similar fashion, but starting earlier in the workflow, from conceptualization instead of simply receiving a brief, as one would a commercial job.
Before I begin, I’d just like to say that I see commercial and editorial work as a resume of a photographer’s skills and personal work as the mark of his or her identity. With this in mind, I think a photographer’s approach towards commercial and personal work should be separated as much as possible.
Of course, things like style and aesthetics will naturally bleed into one another, which is fine, but concept wise, a commercial work should always be done with a client’s products or services in mind, whereas personal work should be something a person wants to express or share with the world, thus making it personal.
In this post I’ll be covering the approach and considerations I put towards a typical production for one of my personal shoots. Unlike commercial projects, there are no set rules and requirements for how you do it. We may all work differently and this is my take. I hope you enjoy the read.
 |
| Motherland Chronicles #43 – Dreaming |
1. Before You Begin
In most cases, we don’t have endless budgets to do whatever we want to do or an avenue of publication for personal work before it begins. Because of this, a lot of doing personal work boils down to challenges in getting people to work with you and finding time outside your main job to make it happen. Here are some key factors to consider in setting up the foundation of your series:
1. Theme and Concept
2. Your Team
3. Model Release
4. Model Search
5. Lighting and Style
6. Timeline
7. Budget
8. Image Terms
1.1 Theme and Concept
This is the starting point, whether it’s a broad theme or specific idea, it expresses what you want to say. It’s the reason you’re doing the project. Having decided on this, it will determine how you’ll approach your entire series in terms of style and affect how your production will be done and what will be involved.
Here are some of the images that inspired me for Motherland Chronicles:
 |
| Top: Antoon van Welie, Suemi Jun |
1.2 Your Team
Makeup, hair, and styling styles change from person to person. Finding the right people who can work with you on a regular basis is extremely important, as their work will play a key factor in how your images will look. A dream team requires failures and time to put together. Be patient, work with people you like and who like you.
If all fails, there’s always a little DIY that can be done by either you or the model. If you don’t have time to learn makeup, models should be able to do their own makeup in most situations, so you can go from there as a starting point before you have a full team.
1.3 Model Release
1.4 Model Search
Model agency is an option too, but rates can get complex and some may not be willing to sign an all-rights release. Keep that in mind when negotiating. And don’t forget, whether you find a person online or in person, always do a casting.
1.5 Lighting and Style
This is a decision you have to make early on. Lighting and post processing are going to be the unifying factors in tying the series together. Even if your theme and concept is consistent, if the style and lighting don’t flow as a series, the images will look like they don’t belong in the same body of work.
I had a number of different influences of art for my series, so I focused on keeping the lighting very soft to create a painterly effect:
 |
| Motherland Chronicles #47 – Womb, #49 – Umbral |
1.6 Timeline
It’s easy to procrastinate or leave images in backlogs when you’re the only one supervising the final work. Make a deadline for yourself and commit to it — there is no quality without quantity — push yourself to meet each deadline and move on. You can come back and polish up the images at a later date when the project has concluded.
1.7 Budget
There can be a lot of expenses involved in a production, draw up an estimate to get an idea of the big picture. It can be very simple, such as the basic things you know you’ll need each time, for example: lighting rentals, transports, meals, maybe $50-100 for props or set production once in a while. It’s good to know how much you’ll need to complete the series so you can ration expenses accordingly.
1.8 Image Terms
Similar to the model release, you want to mention this upfront with everyone you’re working with. Clarify whether you’ll be publishing images whenever each shot is completed and send them to the team, or if you plan on saving it all for when you’ve completed the project and will be publishing it in book form.
 |
| Motherland Chronicles #4 - The Waiting |
1. Inspiration and Research
2. Conceptualization
3. Mood Board
4. Composition Sketch
5. Mood and Lighting
2.1 Inspiration and Research
Based on the theme you have decided for your series, research and find things that click with you. It could be ideas, words or images, save them all and create an inspiration stockpile.
From there, you can pick out specific inspirations or ideas, either make a list of images you have in mind to accomplish upfront, or if you’re like me, go off the list based on what you feel like for each new shoot.
Usually one element is enough to serve as inspiration for a shot — it could be a color, an item, a time period, a location. For cataloging, if it’s just an image-based inspiration, making a folder and saving pictures to it is more than enough. If it’s something that requires purchase, rental or scouting, Pinterest is a good idea for bookmarking the things you find. It’s easy to see everything at one go and also keeps the direct links and descriptions for when you need them. (You can also make secret boards so your research is kept private.)
 |
| Use Pinterest to keep track of information and links to costumes and props. |
One thing to remember for research — stay focused and stick to your original theme — it’s easy to get distracted by new things you discover as you browse and go through links, but not everything that you come across will sit or mesh well with what you’re creating.
2.2 Conceptualization
Based on the inspiration you’re working with, build upon that element to come up with the concept for how the image will look like in your mind.
For example, if you are using a medieval dress, think about the kind of character who will don that, the sort of look she will have and the sort of persona she will carry. Based on her story, think about the type of hair, makeup, accessories and setting that she will be in.
Pull references for each element so you can remind yourself or show your collaborators when those are needed. Images will always convey more easily than words. When it’s all done, tune it realistically to what is achievable and suitable to your lighting and style for the series.
Below is an example from the series inspired by candlelight from Georges de la Tour
 |
| Motherland Chronicles #46 – The Seer |
 |
| Georges de la Tour |
2.3 Mood Board
Create a folder or presentation with references for the style of hair, makeup and styling for your team. I usually narrow down the references I have from the conceptualization step, just 2-3 images for each person is enough.
It will be a good idea to include some mood references for lighting and composition as well, so your team can have an idea of how you will be shooting the photo.
This is a good time for the team to feedback and make suggestions to you or tell you if something cannot be done, so you can work together on an alternative. Clear communications are extremely important in these, make sure everyone knows what they’re doing.
2.4 Composition Sketch
You don’t need mad skills in drawing, and personally I’m only capable of stick-figure sketches, but they serve just as well. It may be a simple scribble, but most of how the image will look takes on a more concrete shape in my head here.
When you’re done, use it as a point of reference for shooting and layout, and your team will also be able to present the best side of the model for that framing. Of course, you don’t have to stick with it 100%. But with these determined beforehand, you will be able to shoot more efficiently and smoothly.
For the triptych “The Three Graces”, I had three incredible Venetian masks from the maker Casin dei Nobili in Venice. Concerned about composition, such as how the images will go well and flow together, sketching out the set was especially important here:
 |
| Motherland Chronicles #26, 27, 28 – The Three Graces |
2.5 Mood and Lighting
As I’ve mentioned above, for a series, besides the stylistic direction of the model and clothing, lighting is one thing that should be kept consistent to lock the series together.
If at any time you think you may need to light something differently for any reason, be sure to test it prior to the actual shoot. For my series, I stuck with large light sources for a painterly look in the studio, and often used a large Profoto Deep White Umbrella XL
 |
| Profoto D1 Air 500 |
3. The Photoshoot
3.1 Details
 |
| Motherland Chronicles #34 – In the Secret Garden |
3.2 Take Your Time
3.3 Model Release
Make sure you file away the full credits of your team, as well as documents such as model releases or any agreements and contracts. Good documentation and filing is very important and you will appreciate the time you took to do them when you need it one day.
5. Publicity
There are many avenues online — such as portfolio galleries like Behance, deviantART, and Flickr, and social media websites like Facebook, Instagram and Twitter. But you should also prepare a press kit to send to blogs and news sites that feature works with similar themes to what you have done that you like.
If you get featured, share the news with your team! They’d love to know that their efforts are acknowledged and that people love the work you have done together. If the images are featured in print publications, don’t be shy about asking the editor for a hi-res PDF. It will definitely look better than the version you can get with your scanner, and will probably be something good to keep in your portfolio and resume for the future.
And that’s it! I hope you will have a good time shooting some personal work, if not, consider doing so! It’s so especially fulfilling and can be highly enjoyable, as well as being a great learning experience. Once again, if you have any questions please don’t hesitate to ask. And if you’re interested in the personal series I’ve been working on, please check out the images below, the Motherland Chronicles website, and also behind the scenes on my blog!
--
Want to learn more? Check out my online course Artistic Portrait Photography.
More: photography articles, gear list
Some of the product links in this post will bring you to Adorama and Amazon
Profoto Blog Series:
- Commercial Photoshoot Walkthrough, from Request to Post-Production / 中文翻译
- Personal Project Walkthrough, from Idea to Realization / 中文翻译
- 14 Steps to Improve Your Photography / 中文翻译
- 15 Tips on How to Break into Fashion Photography
- Top 10 Photography Lighting Tools
- 14 Tips for Photographers Who Want to Go Pro
///
Zhang Jingna:
Website
Article first posted on the Profoto Blog, 26th May 2014.
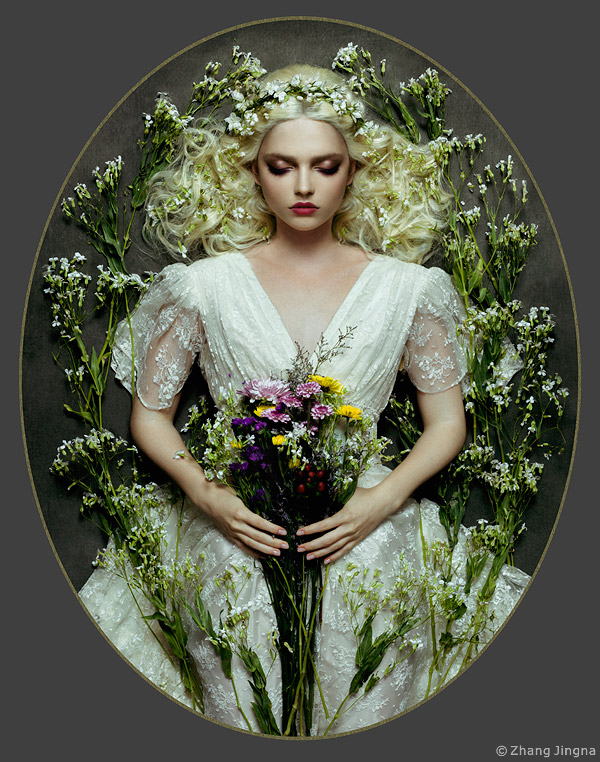 |
| Motherland Chronicles #21 – Her Resting Place |
 |
| Motherland Chronicles #44 – Germaine |
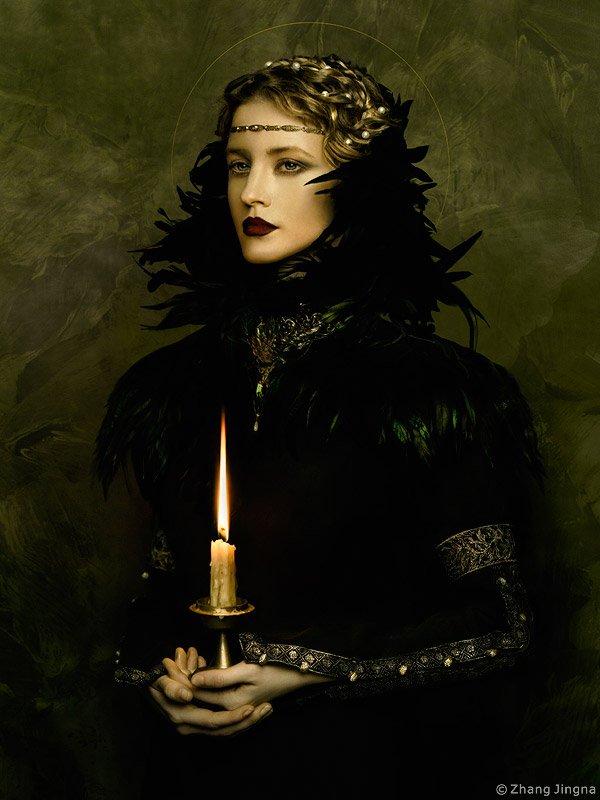 |
| Motherland Chronicles #49 – Umbral |
 |
| Motherland Chronicles #12 – Winter Rose |
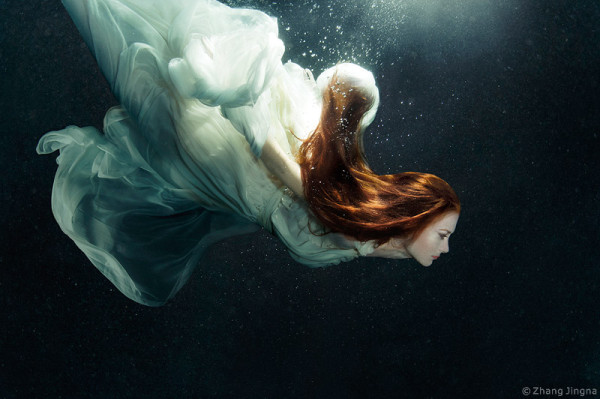 |
| Motherland Chronicles #23 – Dive |
 |
| Motherland Chronicles #38 – A Prayer |
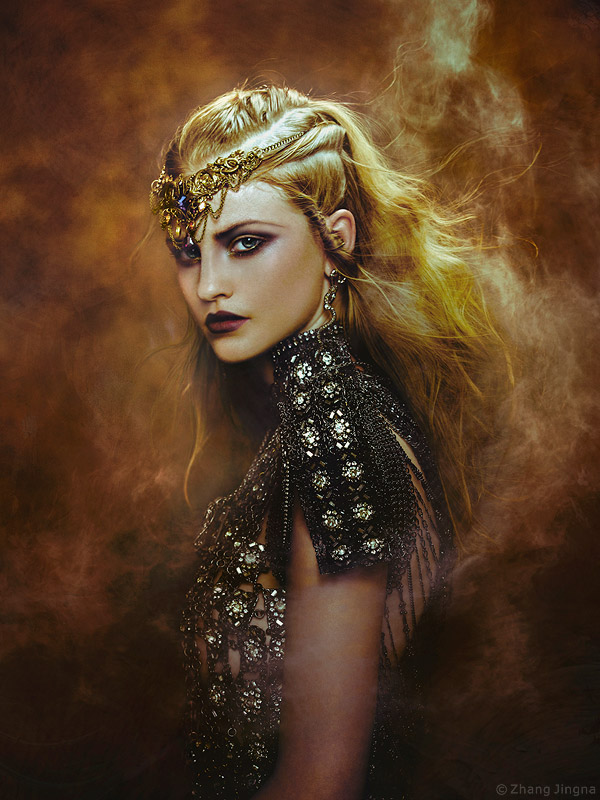 |
| Motherland Chronicles #32 – Ea |
 |
| Motherland Chronicles #41 – From the Ashes |


