Tips & Tricks

How to Make Watercolor Effects in Photoshop Quickly With Actions
Tuts+Photography
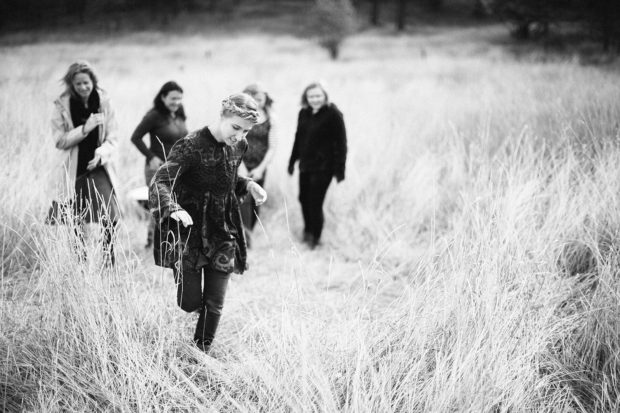
In this tutorial, you will learn how to create an amazing watercolor effect Photoshop action. I will explain everything in so much detail that everyone can create it, even those who have just opened Photoshop for the first time.
The effect shown above is the one I will show you how to create in this tutorial. If you would like to create the even more advanced watercolor effects shown below, using just a single click and in only a few minutes, then check out my TechnicalArt 2 Photoshop Action.

Looking for more watercolor resources? Check out our recommended actions, brushes and more:
What You'll Need
To recreate the design above, you will need the following resources:
1. Let's Get Started
First, open the photo that you want to work with. To open your photo, go to File > Open, choose your photo, and click Open. Now, before we get started, just check a couple of things:
- Your photo should be in RGB Color mode, 8 Bits/Channel. To check this, go to Image > Mode.
- For best results, your photo size should be 2000–4000 px wide/high. To check this, go to Image > Image Size.
- Your photo should be the Background layer. If it is not, go to Layer > New > Background from Layer.

2. How to Create the Brushes
Step 1
In
this section, we are going to create the five watercolor brushes we'll need.
You can either download the textures from the attachment and follow the process, or you can go to Ivan's tutorial to learn how to create your own watercolor textures, or you can download my TechnicalArt 2 Photoshop Action and get over 60 high-quality and resolution watercolor brushes (in this case you can skip this whole section).
Step 2
If you've followed the first option and downloaded the textures, then open the first texture scan in Photoshop. Go to Edit > Define Brush to define this texture as a brush, and name it Temp_Brush_1.

Step 3
Open the second texture scan, go to Edit > Define Brush to define this texture as a brush, and name it Temp_Brush_2.

Step 4
Now open the third texture scan, go to Edit > Define Brush to define this texture as a brush, and name it Temp_Brush_3.

Step 5
Now open the fourth texture scan, go to Edit > Define Brush to define this texture as a brush, and name it Temp_Brush_4.

Step 6
Now open the last texture scan, go to Edit > Define Brush to define this texture as a brush, and name it Temp_Brush_5.

Step 7
Now that we have defined our brushes, we need to adjust their settings and then define them again as new brushes. Press B on your keyboard, Right-click anywhere inside the canvas, select the Temp_Brush_1 brush, and hit Enter. Then go to Window > Brush and, in the Brush window, use the settings below:

Step 8
To define this brush with new settings as a new brush, click on the top right icon in the bottom right corner of the Brush panel, and name it Watercolor_Brush_1.

Step 9
Now press B on your keyboard, Right-click anywhere inside the canvas, select the Temp_Brush 2 brush, and hit Enter. Then go to Window > Brush and in the Brush window use the settings below:

Step 10
To define this brush with new settings as a new brush, click on the top right icon in the bottom right corner of the Brush panel, and name it Watercolor_Brush_2.

Step 11
Now press B on your keyboard, Right-click anywhere inside the canvas, select the Temp_Brush_3 brush, and hit Enter. Then go to Window > Brush and in the Brush window use the settings below:

Step 12
To define this brush with new settings as a new brush, click on the top right icon in the bottom right corner of the Brush panel, and name it Watercolor_Brush_3.

Step 13
Now press B on your keyboard, Right-click anywhere inside the canvas, select the Temp_Brush_4 brush, and hit Enter. Then go to Window > Brush and in the Brush window use the settings below:

Step 14
To define this brush with new settings as a new brush, click on the top right icon in the bottom right corner of the Brush panel, and name it Watercolor_Brush_4.

Step 15
Now press B on your keyboard, Right-click anywhere inside the canvas, select the Temp_Brush_5 brush, and hit Enter. Then go to Window > Brush and in the Brush window use the settings below:

Step 16
To define this brush with new settings as a new brush, click on the top right icon in the bottom right corner of the Brush panel, and name it Watercolor_Brush_5.

3. How to Create the Background
Step 1
In this section, we are going to create the background. Go to Layer > New Fill Layer > Solid Color to create a new solid color fill layer, name it Background color, and choose the color #e5e5e5.

Step 2
Now Right-click on this layer, choose Blending Options, check Gradient Overlay, and use the settings below:

4. How to Create the Sketch
Step 1
In this step we are going to create the sketch. Select the Background layer and press Control-J on your keyboard to duplicate it. Then, drag this layer to the top of the layers in the Layers panel.

Step 2
Now press Control-Shift-U on your keyboard to desaturate this layer. Then, go to Filter > Filter Gallery > Stylize > Glowing Edges and set the Edge Width to 1, Edge Brightness to 20, and Smoothness to 15.

Step 3
Press Control-I on your keyboard to invert this layer. Then, go to Filter > Sharpen > Unsharp Mask and set the Amount to 500%, Radius to 1 px, and Threshold to 0 levels.

Step 4
Change the Blending Mode of this layer to Multiply and set the Opacity to 47%. Then, name this layer Sketch.

5. How to Create the Watercolor Painting
Step 1
In this section we are going to create the watercolor painting. Go to Layer > New > Layer to create a new layer and name it Temp_1.

Step 2
Now set the foreground color to #000000, choose the Brush Tool (B), and pick the Watercolor_Brush_1 brush. Then, adjust the Diameter of the brush as you like, and brush as shown below:

Step 3
Control-click on this layer thumbnail to make a selection of this layer. Then, hide this layer, select the Background layer, and press Control-J on your keyboard to create a new layer using the selection. After that, drag this new layer just below the Temp_1 layer in the Layers panel.

Step 4
Now change the Opacity of this layer to 56% and name it WP_1.

Step 5
Go to Layer > New > Layer to create a new layer and name it Temp_2.

Step 6
Now set the foreground color to #000000, choose the Brush Tool (B), and pick the Watercolor_Brush_2 brush. Then, adjust the Diameter of the brush as you like, and brush as shown below:

Step 7
Control-click on this layer thumbnail to make a selection of this layer. Then, hide this layer, select the Background layer, and press Control-J on your keyboard to create a new layer using the selection. After that, drag this new layer just below the WP_1 layer in the Layers panel.

Step 8
Now change the Opacity of this layer to 40% and name it WP_2.

Step 9
Select the WP_1 layer, go to Layer > New > Layer to create a new layer, and name it Temp_3.

Step 10
Now set the foreground color to #000000, choose the Brush Tool (B), and pick the Watercolor_Brush_3 brush. Then, adjust the Diameter of the brush as you like, and brush as shown below:

Step 11
Control-click on this layer thumbnail to make a selection of this layer. Then, hide this layer, select the Background layer, and press Control-J on your keyboard to create a new layer using the selection. After that, drag this new layer just below the WP_2 layer in the Layers panel.

Step 12
Now change the Opacity of this layer to 62% and name it WP_3.

Step 13
Select the WP_1 layer, go to Layer > New > Layer to create a new layer, and name it Temp_4.

Step 14
Now set the foreground color to #000000, choose the Brush Tool (B), and pick the Watercolor_Brush_4 brush. Then, adjust the Diameter of the brush as you like, and brush as shown below:

Step 15
Control-click on this layer thumbnail to make a selection of this layer. Then, hide this layer, select the Background layer, and press Control-J on your keyboard to create a new layer using the selection. After that, drag this new layer just below the WP_3 layer in the Layers panel.

Step 16
Now name this layer WP_4.

Step 17
Select the WP_1 layer, go to Layer > New > Layer to create a new layer, and name it Temp_5.

Step 18
Now set the foreground color to #000000, choose the Brush Tool (B), and pick the Watercolor_Brush_5 brush. Then, adjust the Diameter of the brush as you like, and brush as shown below:

Step 19
Control-click on this layer thumbnail to make a selection of this layer. Then, hide this layer, select the Background layer, and press Control-J on your keyboard to create a new layer using the selection. After that, drag this new layer just below the WP_4 layer in the Layers panel.

Step 20
Now name this layer WP_5.

Step 21
Select the Temp_1 layer and Shift-click on the Temp_5 layer to select all layers between. Then, Right-click on any of the selected layers and choose Delete Layers.

Step 22
Now select the WP_1 layer, go to Filter > Filter Gallery > Artistic > Watercolor, and set the Brush Detail to 14, Shadow Intensity to 0, and Texture to 1.

Step 23
Now repeat the previous step to apply the same filter to the remaining watercolor layers.

Step 24
Select the WP_1 layer and Shift-click on the WP_5 layer to select all layers between. Then, go to Layer > New > Group from Layers to create a new group from the selected layers and name it Watercolor Painting.

6. How to Create the Texture
Step 1
In this step we are going to create the texture. Go to Layer > New > Layer to create a new layer and name it Texture.

Step 2
Now go to Edit > Fill and set Contents to 50% Gray, Mode to Normal, and Opacity to 100%.

Step 3
Go to Filter > Filter Gallery > Texture > Texturizer and set the Texture to Canvas, Scaling to 200%, Relief to 4, and Light to Top as shown below:

Step 4
Now change the Blending Mode of this layer to Soft Light.

7. How to Make the Final Adjustments
Step 1
In this section, we are going to make final adjustments to the design. Go to Layer > New Adjustment Layer > Curves to create a new curves adjustment layer and name it Color_Look_1.

Step 2
Now Double-click on this layer thumbnail and in the Properties panel enter the settings below:

Step 3
Change the Opacity of this layer to 46%.

Step 4
Now select the Texture layer, go to Layer > New Adjustment Layer > Gradient Map to create a new gradient map adjustment layer, and name it Color_Look_2.

Step 5
Double-click on this layer thumbnail, and then in the Properties panel, click on the gradient to open up the Gradient Editor panel and enter the settings below:

Step 6
Now change the Blending Mode of this layer to Soft Light and set the Opacity to 33%.

Step 7
Select the Color_Look_1 layer and press D on your keyboard to reset the swatches. Then, go to Layer > New Adjustment Layer > Gradient Map to create a new gradient map adjustment layer and name it Overall Contrast.

Step 8
Now change the Blending Mode of this layer to Soft Light and set the Opacity to 37%.

Step 9
Go to Layer > New Adjustment Layer > Vibrance to create a new vibrance adjustment layer and name it Overall Vibrance/Saturation.

Step 10
Now Double-click on this layer thumbnail and in the Properties panel set the Vibrance to +33 and Saturation to +19.

Step 11
Now press Control-Alt-Shift-E on your keyboard to make a screenshot, and then press Control-Shift-U to desaturate this layer. Then, go to Filter > Other > High Pass and set the Radius to 2 px.

Step 12
Change the Blending Mode of this layer to Hard Light and name it Overall Sharpening.

You Made It!
Congratulations, you have succeeded! Here is our final result:

If you would like to create the even more advanced watercolor effects shown below, using just a single click and in only a few minutes, then check out my TechnicalArt 2 Photoshop Action.
The action works so you simply brush over your photo with a color and just play the action. The action will do everything for you, giving you fully layered and customizable results. There are also over 60 high-quality watercolor brushes included with the action that you can use to build the designs even further. The action will also create four textures (watercolor, canvas, paper, and halftone) and 25 preset color looks that you can choose from.
The action comes with a detailed video tutorial that demonstrates how to use the action and customize the results to get the most out of the effect.

If you like watercolor photo effects, don't forget to check out my Aquarelle Photoshop Action.
Using this action you can transform your photos into professional aquarelle artworks with no work at all! You just brush over your photo and play the action. The action will do all the work for you in just a couple of minutes, leaving you fully layered and customizable results.
The action is also made so that every time you run the action you will get a unique result, even if you use the same brushed area. The action will always create unique variations in the watercolor textures, so you can create an unlimited number of results! The action also creates 50 preset color looks that you can choose from.
The action comes with a detailed video tutorial that demonstrates how to use the action and customize the results to get the most out of the effect.

Loving the watercolor style? Find more similar content, here on Envato Tuts+:
 WatercolorHow to Create Realistic Watercolor Photoshop Brushes From ScratchIvan Gromov
 Photoshop Actions18 Cool Photoshop Watercolor Effects & Filters With TextureMelody Nieves
 Illustrator BrushesHow to Make a Watercolor Brush in Adobe IllustratorAndrei Stefan
 TrendsTrend Watch: Watercolor DesignMelody Nieves
 Text EffectsHow to Create a Watercolor Inspired Text Effect in Adobe PhotoshopRose
 TexturesHow to Create a Watercolor Texture in Adobe IllustratorMary Winkler


