How to Change White Balance in Photos With Adobe Camera Raw (Post-Process Basics)
Adobe Camera RAW is a powerful program for processing your pictures. White balance changes colour of the white tones in your photograph so that they appear...
 Best photography related news, reviews and tips in one handy spot. Easy access to the best photography sites. For you to enjoy!

Most photographs will need a little adjusting, particularly
if you’re shooting in RAW: you’re capturing as much information as
possible squeezed into your digital file, and so end up with quite a flat, unprocessed image that needs some extra adjustment to be presentable.
Adobe Camera RAW has long been the staple for many of us, and the great thing is, you can upgrade to the latest version for free. If you have an active CC subscription, your updater will do this automatically. If you have an older, licensed version of Adobe software (Photoshop, Photoshop Elements, or Lightroom, for example) then you can still use ACR, but you’ll need to download the latest version to follow along with this tutorial, which at the time of writing is Camera Raw 12.4.
Open Your Image in ACR. Either drag your RAW image into the linked software (Photoshop, Lightroom, etc) or if you’d like to use ACR to edit a JPEG, you can use ‘Open As’ and change the programme to ACR.
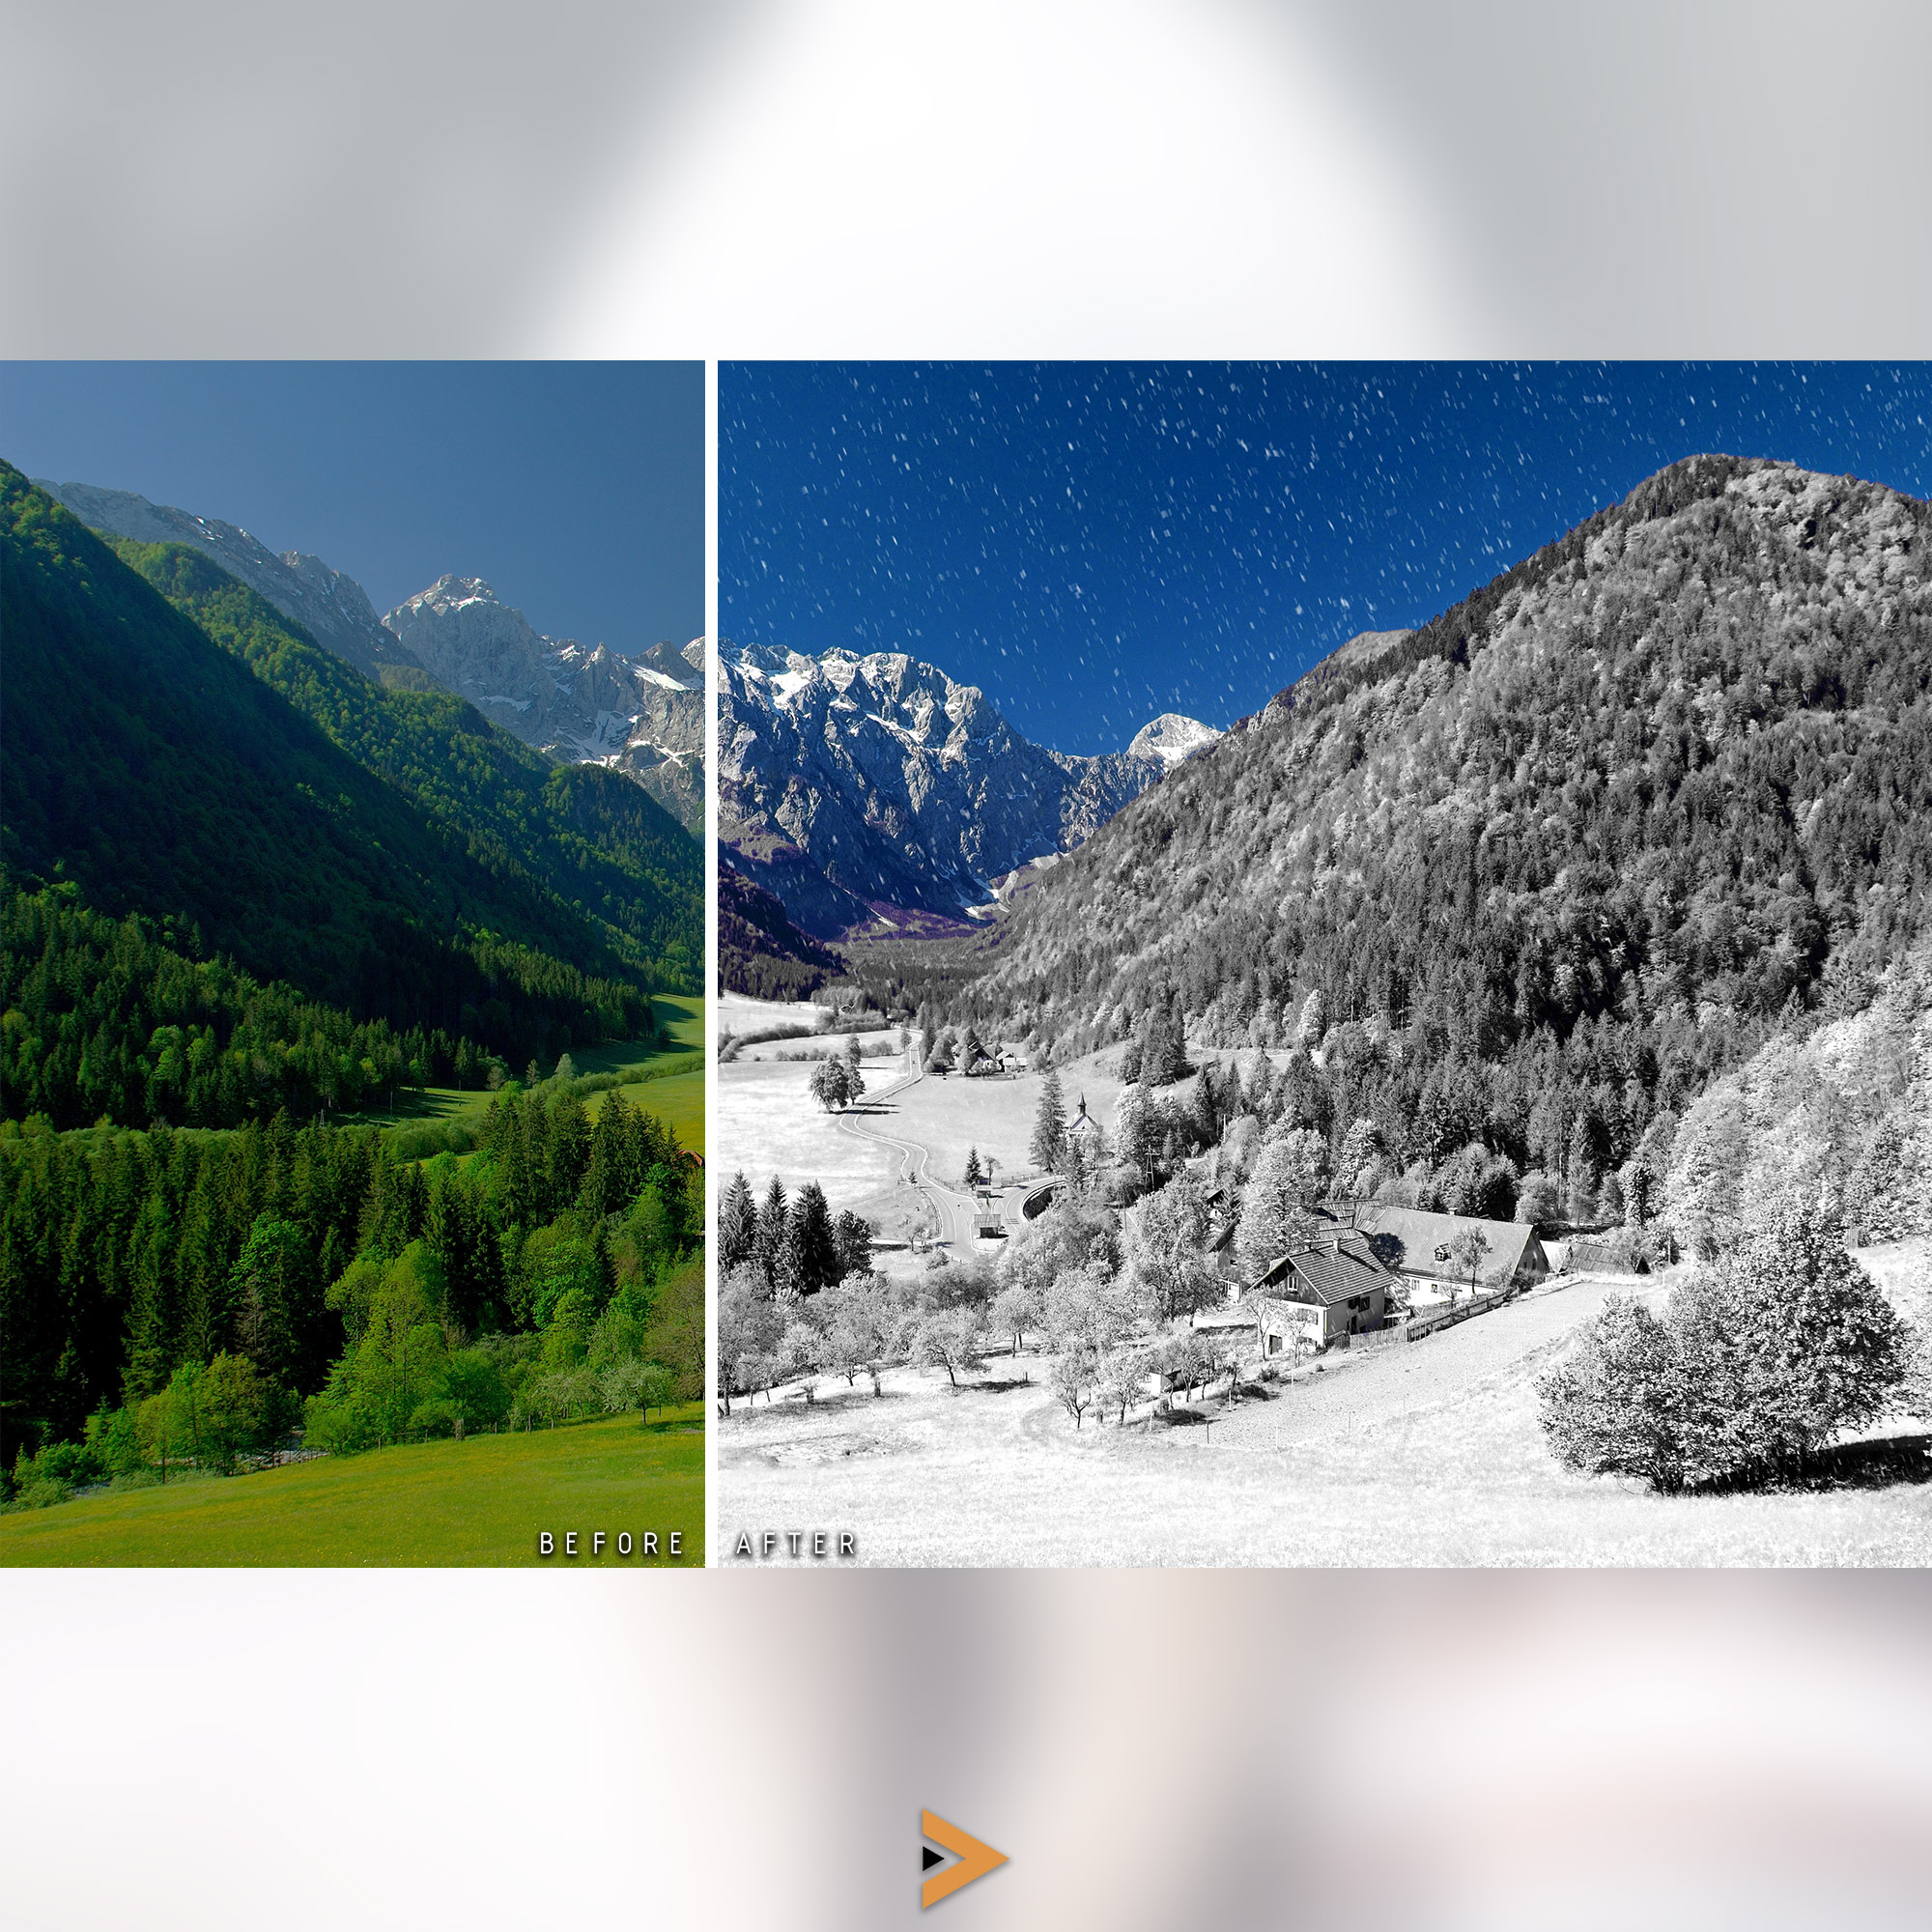
This is the image I’ll be running through the basic corrections with. I’ve chosen it because it’s quite high contrast and the highlights are a little blown and the shadows a little crunched, so hopefully you should be able to see changes more easily.
You'll notice some red and blue dots on the photo — they denote where highlights and shadows are clipping, so a loss of information. You can turn clipping warnings on by clicking the two small boxes above the histogram at the top of ACR.
The very first change I usually make to any image is to apply the specific lens profile corrections to the image. This will slightly compensate for any spherical distortion, and vignette (darkened corners). There’s also the option to remove chromatic aberration which is the coloured purple and green fringing you sometimes see around objects.
The profile corrections can now be found under Optics in the ACR menu.

Your lens profile should automatically be filled, but you can also use the options to search for your lens make and model if not.

Here’s a quick rundown of what you can see in the basics menu and what it does.
Each image will be different, but if I make some adjustments
to the example image you can see the effect.

Mostly these are small adjustments. I tend to find that the most dramatic slider pulls are the highlights and shadows sections of high contrast images, to bring back some of those details that may have been lost. Be wary of pulling the sliders all the way though or you can end up with an image that looks a little faux HDR.
You'll notice that the red areas on the sky which were letting me know the highlights were clipping have now resolved and that detail is back.

Here's a side by side comparison of the two images. You can see that the exposure is better now, there's detail recovered from both the highlights and shadows. I warmed the image with the Temperature slider and added some contrast and midtone sharpening.
If you're happy with small tweaks then this is all you'll ever really need to get to grips with and this is enough to make some solid basic global adjustments. When you're finished, just open your image into your linked Adobe software and save it to your desired format.
If you're using an older version of Camera Raw, you might find this video useful: